March 31, 2020
One of our favorite handwork projects in Marianne’s Parent/ Child classes and in our LifeWays San Francisco Bay Area Training is sewing with felt. Marianne says, “I would like to share this easy project for flying birds and shooting stars that can be quickly sewn at home.”
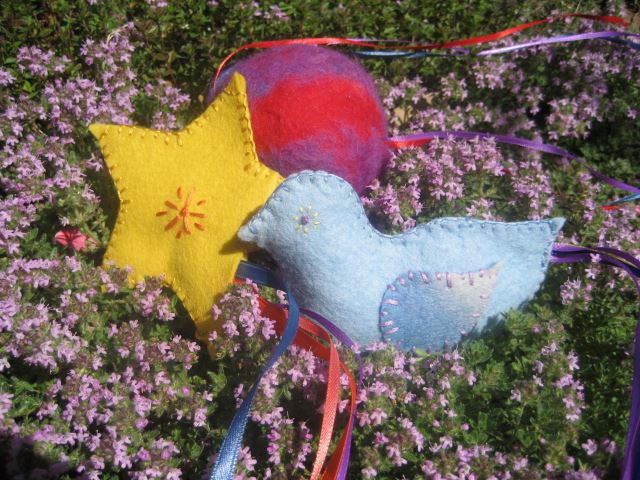
Shooting Star and Flying Bird Beanbags
Materials needed:
Wool or wool blend felt in the colors of your choice
Embroidery floss, 6 strand, split into 3 stands, in colors to match felt,
Embroidery needle
Rice, millet or small beans or light sand
Thin multi-colored satin ribbons, each 12” to 20” long in your choice of colors
Make a copy of the pattern. (Click here to access the pattern.)
Cut out the pattern on the felt.
For the bird cut out 2 wings as well and sew these on to the bird before sewing the two bird pieces together.
If you wish to add decorative embroidery stitches to the stars do that before you sew the two pieces together.
Using the blanket stitch, sew around the beanbag, leaving at least a ¾” opening. On the stars and bird, leave the opening in the back/rear of the animal.
Fill your beanbag with small beans or rice. Before sewing the opening closed, insert the multicolored ribbons and then stitch closed using a running, or plain sewing stitch. Make sure this opening is closed so your beans and ribbons do not fall out.
Add eyes to the bird. Toss in the air and watch your little bird and shooting star fly high!
If you have questions, feel free to email Marianne here.
You can find wool felt at A Child’s Dream Come True
Thank you for this lovely idea Marianne! We will certainly makes some of these.
Thank you so much Marianne for sharing these wonderful sewing projects.
I believe there are a few parents in my program who would be very interested in them.
Warmly,
Sara